Hey Growers, it’s time to start getting excited about Spring! Gardeners everywhere are gearing up for “planting season”, and we’re here to talk about one of the most important methods of preparing for your grow season – seed starting – AKA seed germination!
What is seed starting and why is it important?
Seed starting is termed germination and it may sound like something only pros do, especially when you add “transplanting” to the conversation, but it’s easier than you might think and there are even complete seed starting kits that come with everything you need to do it. Let’s talk about why you should start your own seeds!
While some growers buy clones or seedlings from a nursery, many prefer to do what humans have done for over 10,000 years, start plants with their own seeds. Growing from seed is preferred because it’s impossible to verify that any nursery plant is free of disease or infestation which can spread to the rest of your garden. Plus, seed starting supplies are relatively cheap compared to buying from a nursery. If plants do have diseases or pests, buying already started plants ends up costing quite a bit more in the long run. Also, nursery selections are limited to what the nursery has started from seed for you, whereas if you start from seed you have a larger selection to choose from. Last, a real pro will start to save seeds and have their own personal variety.
Starting Seeds / Germination
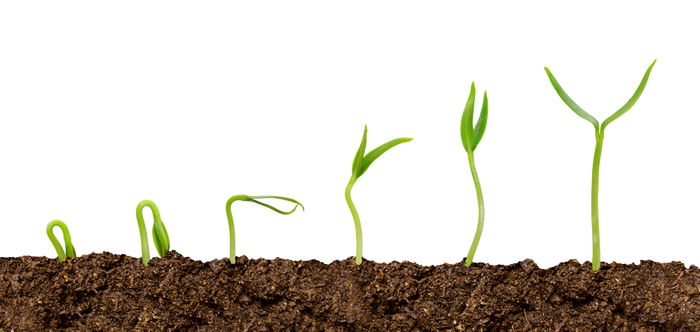
All flowering plants and conifers on Earth produce seeds to reproduce. All seeds have a few things in common. They have an outer shell called a shell coat which protects the insides. When the outer shell gets wet it softens and allows the baby plant inside to grow. There are actually tiny leaves inside the seed called cotyledons, which will grow away from gravity, and a tiny root that will grow towards gravity. There are also nutrients stored in the seed the baby plant will use to get the leaves above ground.

What is Germination- Germination is a term you’d typically hear in Biology class. It is the process by which a plant begins its growth from a seed. Seeds are basically dormant baby plants, so what you need to do is create an environment that breaks the dormancy. To get your seeds to germinate, an environment that has moisture, warmth, and air (oxygen) is required. For plants with small seeds, this may also mean that you need light for the seeds to break dormancy. Seeds like lettuce, basil, poppy, snapdragon and others will need to be exposed to 6 or more hours of light a day to germinate. All seeds will have plant nutrients stored as protein and oil right inside of them. However, smaller seeds will have less food/nutrients than larger ones. The smaller the seed the sooner you will want to make sure the seedling has nutrients, which we will discuss seedling care in more detail below. So, since the seed already has the food it needs, the only things you need to provide it are a safe, warm, moist (not wet) place with good aeration and a little time. When placed in a warm, moist environment most seeds will germinate in 5-14 days. Also, younger seeds tend to germinate quicker than old seeds.
Seed Starting Methods
There are many different methods and techniques for getting seeds started. One of the more well-known practices is another throwback to JR. High Biology class called the “paper towel method” in which seeds are placed inside a lightly dampened paper towel, which is then placed inside a plastic bag and left in a warm area. The paper towel provides enough moisture to soften the seed and enough aeration so it does not rot, and the plastic bag creates a barrier to foster humidity and warmth (a miniature greenhouse, basically). There are enough testimonials on the success of this method to fill a library, but we advise against it, especially for inexperienced growers. See, once the seeds have “popped” and begun to grow their first root called the radicle, has tiny fine hairs that will grow into/attach themselves to the surrounding medium, in this case, the paper towel. So when you remove the seedling by pulling it off the paper towel, you risk destroying many or most of those hairs, which can kill or seriously hamper development. You could cut the paper towel and plant it with the seed, but again this is not what the pros do for a reason.
Best Way to Start Seeds- The best method by far for achieving optimal seed starting conditions is to use seed starter plugs in a tray paired with a heating mat and a humidity dome. Most seed starting kits include all these things, which will provide ideal levels of warmth, moisture, and air for very little money. For instance, our HTG seed starter kit is a super-cheap option that includes a 55-site floater (with all-natural plugs which contain a small amount of nutrients for your seedlings’ early growth), a seedling heat mat, and a humidity dome, all for under $35. Starting seeds in starter plugs or rockwool cubes in a seed kit is easy for beginners, efficient enough for pros to do and will make transplanting the plants easier.
Seed starting kits don’t just make germination easier, they also allow you to maintain seedlings for a longer period before transplanting or keep backups if anything goes wrong with your first transplants. Complete kits such as the Seed Station seed starter kit with grow light are capable of maintaining your plants for a couple weeks before you need to do anything. Basically, all you should have to do after planting in the seed station is set up your light and monitor your starts. The most common “problem” that may occur is drying of the plugs, which as you may have guessed is easy to fix. Just make sure your plugs stay damp and you’re all set!
Pro tip: Don’t water plugs from the top in floating starter trays. Instead, add water to the bottom of the tray and let the plugs soak it up. Remember, some seeds need light to germinate and once any seedlings sprout and develop their first little leaves (cotyledons), they’ll begin to require light.
Growing Seedlings – Seedling Care
The conditions that make seeds germinate are also great for fungus. When using a humidity dome, the better models will have adjustable air vents on them, keep the vents open to get airflow and take them off at least once a day. If the dome does not have vents, you will want to take it off a few times each day to get airflow which will reduce the chance of fungus growing in your seed starting kit. Always sterilize the dome after each season and store it after it is completely dry. If using a seedling heat mat keep an eye on the moisture in your medium, once seeds germinate they will start to pull water from the medium and you don’t want to medium to dry out. This is a delicate time, you need to be very attentive and careful with your seedlings. You will also need to provide your seedlings light as soon as they germinate. When the first leaves (cotyledons) appear, the plant can start to photosynthesize for its energy so light is critical at this point. If you’re serious about getting your sprouts off to the best start, just putting them near a window simply will not do.
Lighting For Seedlings- Fluorescent T5 grow lights are a great choice for seedlings because the low heat will help to prevent them from drying out (With small roots if the medium gets too dry the plant will die) and most fluorescent bulbs have a wide spectrum of light, often favoring blue light so they will promote good vegetative growth. Lower wattage LED grow lights are also an excellent choice for the same basic reasons. A wide variety of fixture types are available including panels as well as LED strip lights, which are very similar in design to T5 fluorescent fixtures. Full-spectrum LED grow lights provide a similar output to vegetative oriented fluorescent bulbs, and there are even specialized ‘Veg LED’s’ that are specifically geared toward seed starting and early vegetative growth. Any of these lights will dramatically improve seedling growth and vigor vs. your windowsill.
Pro tip: Keep the lights on 24/7 for the first month. This has been shown to speed up the rate of growth. After a month, plants will need a dark cycle to keep their physiology on track.
Seedling Nutrients– Seedlings will need a ½ to 1/3 diluted form of nutrients compared to larger plants. To promote root growth you should use a high phosphorus fertilizer. Any fertilizer labeled bloom will be high in phosphorus. All fertilizers, whether they’re hydroponic or organic nutrients, have three numbers on it (N-P-K), the middle number (P) is the percentage of phosphorus so just make sure the middle number is the highest and that will be good for seedlings as a ½ to 1/3 ratio of the amount recommended for larger plants. Another benefit of the starter plugs in the kits is they have nutrients in them, so you will not need to add nutrients for a couple weeks until the plants are ready to transplant.
Transplanting Seedlings
Whether you are using a seed kit, or you started your seeds in small containers you will eventually need to transplant them into bigger nursery pots or to their outdoor growing area. So how do you know when they’re ready? We recommend checking the roots of your plant regularly after germination; you can pop your plugs out of their holes without damaging the plant, just be gentle. Your seedlings will be ready for transplant once the roots are visible from the bottom or the sides of the plugs. This will ensure that your plant has the best chance of successfully rooting in its new medium.
Tools for transplanting- Once you’re ready to transplant, you will need a larger container, more grow medium or larger rockwool cubes, nutrients and a grow light suitable for the size plant you are growing. In some cases, you may need to transplant into an interim or temporary container before planting into a final container or spot. If you intend to transplant into the final container, a general rule is a gallon of grow medium for every foot of height your plants will grow. For more on transplanting, tune into our next Talking Shop. We’ll cover everything you need to know about the transplanting process.
Seed Storage
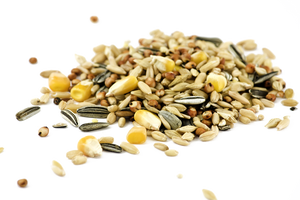
If you do not want to buy seeds, you can just save them from your garden at the end of the growing season. Make sure the seeds are ready to be picked, they should have a fully formed and hard seed coat, and most will change color as the seed develops into maturity. You can google images of mature seeds for whatever plant you are growing to get a good idea of what they should look like. Once the seeds are harvested, if you are not going to germinate them within a month, you should store them properly. Proper storage means an environment the opposite of what you create for germination – dry and cold with no oxygen.
Seeds should be stored in labeled airtight containers. Many pros also store seeds with a desiccant to keep moisture in the container away from the seeds. A cool closet or basement is good for a year, a refrigerator will keep your seeds for up to two years, and a freezer should keep seeds for up to three years (avoid storing seeds on the fridge/freezer door as they won’t keep as long). By “keep” or “keep time”, we mean that some seeds won’t germinate after this period. The longer the seeds are kept, and how they were stored will determine what percentage germinate. Eventually, after enough time and/or with a poor storage environment, none of your seeds will germinate. Poor storage may mean after a couple years 80% of your seeds won’t germinate. Once you start storing your own seeds, you can take your garden to the next level by picking plants with the qualities you like and breeding them – and eventually – you can have your own custom variety that is suited just for you!
To sum it all up, seed starting is a fairly straightforward process that comes with a lot of benefits over buying from a nursery – whether you’re growing indoors or outside! You only need a few supplies to do it right, all of which are affordable for hobbyists and professional growers alike. With a little forward planning and attention to a few details, any grower can sow the seeds of success all on their own!

____________________
Questions, tips, or tricks to share? Join the conversation, and share your seed starting experiences! Throw a picture on Instagram and tag us in it (@HTGSupply) – we’d love to see your results! And don’t forget to check out this week’s coupon code and sale information below! From all of us here, good luck, stay safe, and Happy Growing!
THIS WEEK’S COUPON CODE: SEEDS0318
Enter the promo code at checkout for a 10% discount on select the select seed starting gear featured below. Visit your local HTG Supply and simply mention this article to get the deal in-store as well! Thanks again for tuning into Talking Shop with HTG Supply! Offer valid through HTGSupply.com and in-store 03/02/18-03/16/18. Cannot be combined with other offers. Follow us on social media for all the Sales, Events and Customer Appreciation Days. In addition, learn more about indoor growing and get all kinds of tips, tricks and techniques!